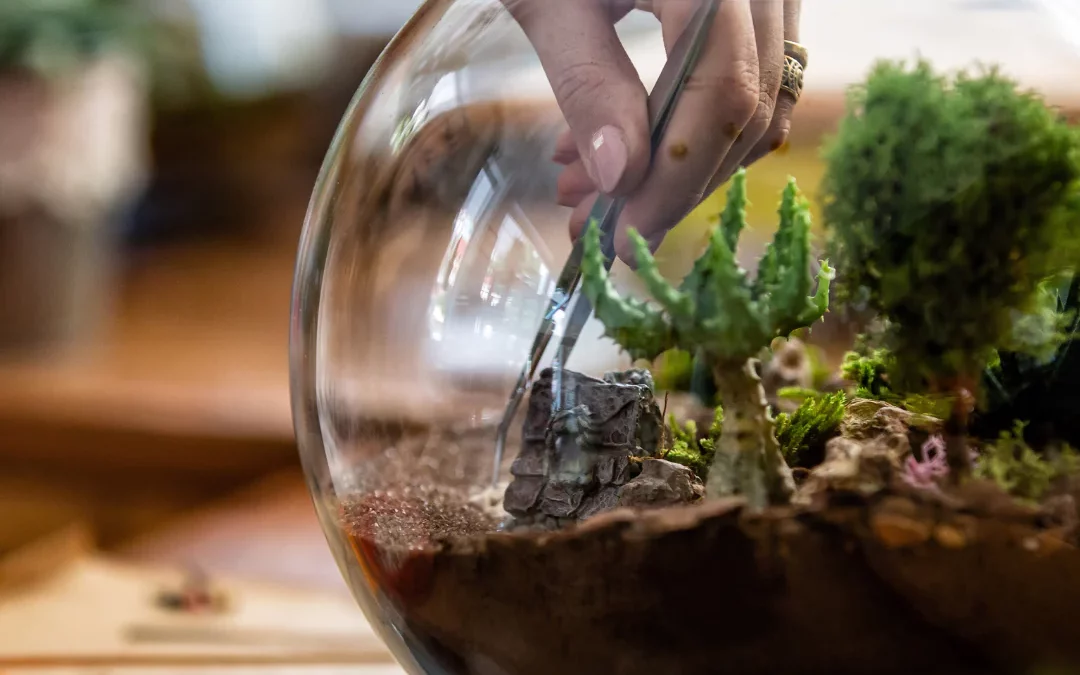
Creating an indoor bottle garden is a compact way to grow small, humidity-loving plants. A closed container recycles moisture, so it can need much less watering than an ordinary houseplant pot. It still needs occasional checks, pruning and moisture adjustments.
This guide explains how to choose a suitable bottle, prepare the growing medium, select plants and care for the finished display.
What Is an Indoor Bottle Garden?
A closed bottle garden is a type of terrarium: a planted glass container with a lid or cork that traps moisture. Water evaporates from the compost and is released by the plants, then condenses on the glass and returns to the growing medium. Iowa State University explains this miniature water cycle.
Bottle gardens are worth considering if you:
- Like small, contained plant displays
- Have a desk, shelf or side table with suitable light
- Enjoy mosses, miniature ferns and tropical foliage plants
If you prefer a moss-focused display, see our guide to making an indoor moss garden.
Best Bottles and Containers for Indoor Bottle Gardens
Choose clear, uncoloured glass and a removable lid. A wide opening makes planting, pruning and removing a struggling plant easier; narrow-necked bottles are more fiddly.
Options include large lidded jars, demijohns, carboys and purpose-made terrarium bottles. Before choosing one, check that:
- The base is stable
- The opening will accommodate the plants and your tools
- There is room above the compost for growth
- You can remove the lid whenever maintenance is needed
A suitable jar you already own is a reasonable starting point; you do not need a complete kit. The RHS guide to bottle gardens covers container choices and setup.
Materials You’ll Need
- A clear glass container with a removable lid or cork
- Small plants suited to humid, enclosed conditions
- Peat-free potting compost and horticultural grit
- Long-handled tweezers, chopsticks or a spoon for planting
- A funnel or folded-card scoop
- A spray bottle with clean water
- Clean scissors and a cloth
- Optional: washed gravel and small decorative stones or ornaments
Gravel is not essential, and activated charcoal is not included in this basic setup. Neither should be relied on to prevent overwatering or mould.

Step-by-Step: How to Create an Indoor Bottle Garden
1. Clean and Dry the Bottle
Wash the bottle with warm, soapy water, rinse away all soap and let it dry. A bottle brush is useful for reaching through a narrow neck. Clean your planting tools too.
Check plants before enclosing them, including leaf undersides and stems. Leave out any with pests, unexplained damage or signs of rot. Keep new plants separate for observation before adding them to the display. University of Maine Extension recommends inspecting and isolating new houseplants to reduce pest and disease problems.
2. Decide Whether to Include Gravel
A gravel layer does not make a bottle drain. There is no outlet for surplus water, so careful watering matters whether or not you use stones.
Guidance differs: the RHS includes washed gravel in its terrarium method, while Oklahoma State University advises against drainage layers, explaining that water can remain in the compost above them. You can omit the gravel. If you like its appearance, keep it shallow and do not treat it as protection against soggy compost.
You can also leave out activated charcoal. It is not a substitute for removing decaying material or correcting excess moisture.
3. Add the Compost
Use enough growing medium to accommodate the plants’ root balls, rather than following a fixed depth for every bottle. Leave plenty of space above it for foliage.
- The RHS suggests roughly four parts peat-free multi-purpose compost to one part horticultural grit.
- Lightly moisten dry compost before adding it; it should not be saturated.
- Avoid garden soil, which can be too dense for this enclosed container.
Use a funnel or folded card to guide compost through a narrow opening. Gently shape the surface without packing it tightly.

4. Choose the Right Plants
Choose compact plants with similar light and moisture needs. A small plant in a shop is not necessarily a miniature variety, so check its expected size.
- Fittonia: a foliage option for a humid display
- Miniature ferns: choose varieties that fit the available space
- Mosses: choose types supplied for terrarium conditions
Baby’s tears (Soleirolia soleirolii) is another option, but it can spread vigorously and needs room and trimming. The RHS describes its fast-growing, mat-forming habit.
Avoid cacti and desert succulents in a closed, humid bottle. For a separate dry-growing project, see our guide to making an indoor cactus garden.
Small rooted plants are easier to position than large specimens. Remove dead or yellowing leaves before planting. Penn State Extension’s closed-terrarium guide covers plant preparation and establishment.
5. Plant Carefully Inside the Bottle
Try the arrangement outside the bottle first, then plant one specimen at a time.
- Ease each plant out of its pot and gently loosen excess compost where needed, without stripping or damaging the roots.
- Put the tallest plant at the back for a one-sided display, or near the centre if viewed from all sides.
- Make a planting hole and position the plant at its previous growing depth.
- Use tweezers, chopsticks or a spoon to guide compost around the roots.
- Firm gently, leaving space between plants and keeping foliage away from the glass.
Do not squeeze in an oversized root ball simply to fill the bottle. Choose a smaller plant or a larger container instead.
6. Add Decorative Finishing Touches
Small stones, gravel paths or a simple ornament can finish the display. Clean decorations before adding them and keep them sparse so plants have room to grow.
For a straightforward first attempt, leave out bark and driftwood. Iowa State University cautions that wood can decay and introduce unwanted fungi or insects in a terrarium.

7. Water Lightly and Close the Bottle
Add water in small amounts, aiming for damp compost rather than a saturated mixture. If it is already moist, little extra may be needed. Do not deliberately create a pool at the bottom.
Let wet foliage dry before putting on the lid. Check the bottle regularly during its first few days as the moisture cycle settles.
- Some condensation: normal in a closed bottle, but assess the compost and plants too.
- Persistent heavy condensation with very wet compost: remove or loosen the lid to let moisture escape, then reassess before closing it.
- Little condensation: check the compost before adding water; clear glass alone is not a watering schedule.
Penn State recommends gentle initial watering and allowing wet foliage to dry before closing. It is easier to add a little water later than to correct a soaked bottle.
Where to Put Your Indoor Bottle Garden
Choose a bright position out of direct sunlight. Sun falling on the glass can cause heat to build up inside. Avoid placing the bottle beside a radiator or other heat source.
Check the position through the day: a shelf that is shaded in the morning may receive direct afternoon sun. Follow the light requirements of the plants you have chosen, rather than assuming any indoor shelf will do.
Simple Maintenance Tips
Once the bottle has settled, make a habit of checking it every week or two rather than watering automatically.
- Check moisture: look at the compost and plant condition as well as condensation. Add only a little water when the compost is becoming dry.
- Trim growth: keep foliage from crowding neighbouring plants or pressing against the glass. Remove all clippings.
- Remove decay: take out yellowing, dead or rotting material promptly.
- Watch for pests: investigate insects or leaf damage rather than treating unidentified problems. Remove an affected plant for inspection if necessary.
- Make room: replace plants that become too large rather than repeatedly forcing them back into the available space.
The RHS and Iowa State guidance both emphasise sparing watering and managing growth. A successful bottle garden is low-maintenance, not maintenance-free.
FAQs About Indoor Bottle Gardens
How often do you water an indoor bottle garden?
There is no fixed interval. Some established closed terrariums go months between waterings, but this depends on the lid, plants and growing conditions. Check the compost before adding water and do not assume wilting always means thirst.
Can you open the bottle garden?
Yes. Open it to prune, remove debris or let excess moisture escape. Close it again after checking conditions. A permanently open container loses more moisture and needs different watering attention.
What if mould appears inside the bottle?
Remove mouldy debris or affected decorations and inspect the plants. If the compost is too wet, stop adding water and temporarily open the lid. Remove rotting plants rather than leaving them enclosed. Charcoal should not be treated as a mould remedy.
Does a bottle garden need gravel or charcoal?
Neither is essential to this method. Gravel cannot drain water out of a container without an outlet, and charcoal does not replace careful watering and plant hygiene. Leave enough space for a suitable growing medium and healthy roots.
Final Thoughts on Creating an Indoor Bottle Garden
Start with a container you can reach into, a few suitably small plants and restrained watering. Leave room for growth and use regular checks to decide whether the bottle needs attention.
Once you are comfortable managing one display, experiment with different bottle shapes and plant arrangements.
Related Articles
BRING MORE MINI GARDENS INTO YOUR HOME
How to Make an Indoor Succulent Garden
Create a low-maintenance, sun-loving display to complement your bottle garden and style your space beautifully.