
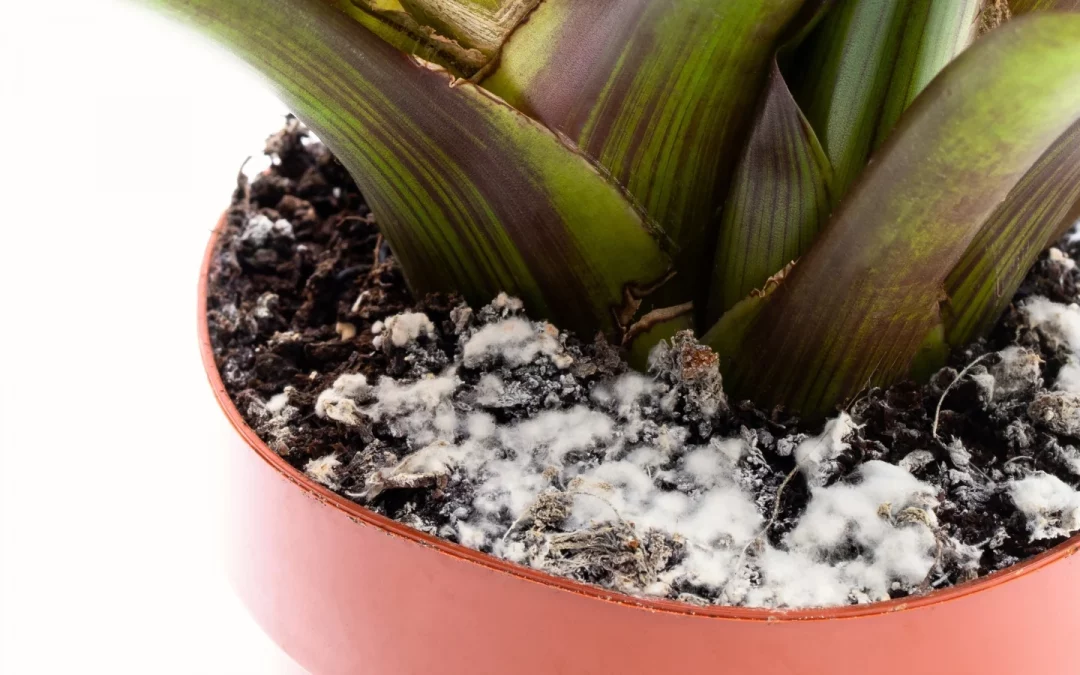
To prevent mould in indoor soil, start by checking watering, drainage and the conditions around the pot. Common surface fungal growth can develop on organic material in potting compost; visible mould alone does not prove that the roots are unhealthy.
Quick answer: prevent mould in indoor soil
Check moisture beneath the surface before watering, and follow the plant’s needs rather than a fixed schedule.
Give crowded pots some breathing space without exposing plants to strong draughts.
Use a pot with drainage holes and empty water collected in the saucer or decorative outer pot after draining.
If desired, gently remove loose surface growth without digging into roots; this tidies the surface but does not correct wet compost beneath it.
If growth keeps returning, check drainage, compost condition and the health of the plant rather than repeatedly scraping the surface.
Do this first: Check whether the plant looks healthy, whether water is trapped beneath its pot and whether the compost below the surface is still wet. Do not automatically stop watering a plant whose root ball is already dry.
If the pot has a persistent sour or otherwise unpleasant smell, investigate further. Why Indoor Plant Soil Smells Bad (7 Causes + Fast Fixes) is a helpful diagnosis checklist, but smell alone does not identify a particular disease.
Why mould shows up on indoor plant soil
Fungi can feed on dead organic material in compost. The RHS guide to saprotrophic fungi explains that their thread-like growth can be visible on soil surfaces, bark and compost. This is different from diagnosing a fungus that attacks the plant.
When surface growth appears, useful conditions to review include:
compost that remains damp between waterings
crowded pots with limited air circulation
light levels that do not suit the plant
frequent watering without checking whether the pot needs it.
A healthy-looking plant with a small patch of surface growth is a different situation from a plant declining in persistently saturated compost. Long periods sitting in water can deprive roots of air, but surface mould is not proof of root rot.

Remove mould without stressing the plant
If the plant is otherwise healthy, removing a small patch of surface growth is optional. Concentrate on checking the conditions that allowed it to develop.
A simple clean-up routine:
gently lift away loose mouldy material with a spoon, taking only what comes away without disturbing roots or the plant’s base
dispose of the removed material rather than mixing it back into the pot
wipe dirt from the pot rim and saucer
check moisture below the surface before deciding when to water again.
Do not dig out a fixed depth from every pot. Avoid disturbing seedlings, shallow roots or small plants, and do not dry out a moisture-loving plant simply to clear surface growth.
If you keep seeing tiny flies around the pot as well, check for fungus gnats and review wet compost conditions. Fungus Gnats helps you investigate that problem.
Fix the real cause: compost staying wet too long
If the compost is persistently wet, surface clean-up alone will not address the problem.
Stop automatic “little top ups”
Avoid watering simply because another day has passed. For many established houseplants, a useful approach is to:
check that the plant actually needs water
water thoroughly when needed, then let excess water drain
check moisture again before the next watering, allowing the degree of drying appropriate to that plant.
A dry surface can conceal wet compost below it. Conversely, seedlings and plants that need consistently moist compost should not be left to dry out as a mould treatment. Indoor Plant Watering Mistakes is a useful reference.
Make sure water can escape
Check drainage holes and lift the inner pot out of its decorative cover to look for trapped water. Allow the pot to drain after watering, then empty its saucer or outer pot. Drainage holes help excess water escape, but cannot compensate for repeatedly watering compost that is already wet.
If you’re dealing with soggy pots often, Improve Indoor Plant Drainage provides practical checks.

Improve airflow without creating draughts
Start with spacing and suitable room ventilation rather than buying a fan. Gentle air circulation is not a substitute for correcting waterlogged compost.
Simple changes to consider:
space crowded pots so air can circulate around them
avoid tightly packed corners and shelves
ventilate when conditions allow, keeping plants away from cold or strong direct draughts
check that the plant receives suitable light, rather than moving it into strong sun solely to dry its compost.
If you already use a fan, keep its airflow gentle and indirect. Avoid a strong stream aimed at leaves or compost. The RHS guide to helping a poorly houseplant notes that draughts can damage foliage.
For practical airflow ideas, Air Circulation and Indoor Plant Health explains further options.
Upgrade the soil mix when needed
Potting compost can degrade and compact over time, reducing air around roots. However, a small patch of surface mould alone is not a reason to repot an otherwise healthy plant.
When repotting is needed:
choose a potting mix suited to the species, rather than assuming all houseplants need the same blend
consider suitable drainage ingredients, such as perlite, where the plant needs a more open mix
avoid a dense, poorly draining mix for plants that need well-aerated compost.
Iowa State University Extension’s houseplant care guide explains how potting ingredients balance water retention and drainage. Adding an ingredient to the surface will not repair saturated compost throughout the pot.
Pot choice that helps manage moisture
The pot should suit the root system and the plant’s watering needs.
Helpful checks:
choose a pot with drainage holes
avoid moving a small root ball into a much larger pot unnecessarily
consider unglazed terracotta where faster moisture loss suits the plant, while checking that it does not dry out too quickly.
No new pot is necessary if the existing one is appropriately sized and drains freely.
The RHS houseplants growing guide advises checking whether a pot needs water rather than watering routinely, and generally watering when the compost surface becomes dry. Use that as a starting point alongside the plant’s particular requirements and moisture beneath the surface.
Common Indoor Compost Mould Problems
Mould keeps coming back after you remove it
Review the whole pot rather than repeating surface removal:
check moisture beneath the surface and for trapped water
review watering, light, airflow and whether the compost drains adequately
look for yellowing, wilting, soft stems or other signs of decline.
If the plant is declining, especially if it wilts while its compost is wet, inspect the roots if the plant can be gently removed without damage. Softened, discoloured roots warrant further investigation; University of Maryland Extension’s diagnostic guide lists these among signs of root rot. Seek identification advice if the cause is unclear. Persistent unpleasant odours also deserve investigation, but do not establish a diagnosis.
White crust and mould at the same time
A hard or crystalline white crust may be mineral or fertiliser residue rather than fungal growth. Check its appearance and review feeding and water quality before treating it as mould. Do not automatically flush an already saturated pot; resolve drainage problems first.
Mould appears right after repotting
A different mix or pot can change how moisture is retained. Check the compost rather than following a fixed post-repotting watering schedule. Ensure the pot drains and avoid repeatedly repotting a healthy plant solely because surface growth appears.
FAQs About Preventing Mould in Indoor Soil
Is mould on potting soil harmful to plants?
Some visible growth is decomposer fungi feeding on organic material, not a disease attacking the plant. Appearance alone cannot establish what it is. Assess the plant’s condition and moisture throughout the pot; persistent saturation or plant decline needs closer attention.
Should you throw away mouldy potting soil?
Not automatically when an established plant is healthy and growth is confined to the surface. Check growing conditions first. Declining plants or damaged roots require a different assessment, and removing surface compost alone may not be enough.
Does misting cause soil mould?
If misting repeatedly wets the compost, include it when reviewing how much water reaches the pot. Do not assume it is the only cause, and follow the plant’s humidity and watering requirements.
Will cinnamon stop mould?
Do not rely on cinnamon as a treatment. Check watering, drainage and plant condition instead; sprinkling a household ingredient onto the surface does not address saturated compost or identify a disease.
Final Thoughts on Preventing Mould in Indoor Soil
Preventing repeat surface mould starts with understanding the pot’s conditions, not buying a product. Check moisture beneath the surface, remove trapped water and provide suitable light and gentle air circulation. Optional surface clean-up can improve appearance, but recurring growth, unpleasant odours or plant decline call for closer investigation. Match any drying or repotting changes to the plant’s needs.
Related Articles
Stop damp soil problems before they start
Build a Simple Routine That Keeps Pots Drying Properly
Mold is usually a symptom of compost staying wet for too long. Once drainage, airflow, and watering rhythm are dialled in, most indoor soil issues become easier to prevent — and plants grow more reliably.