
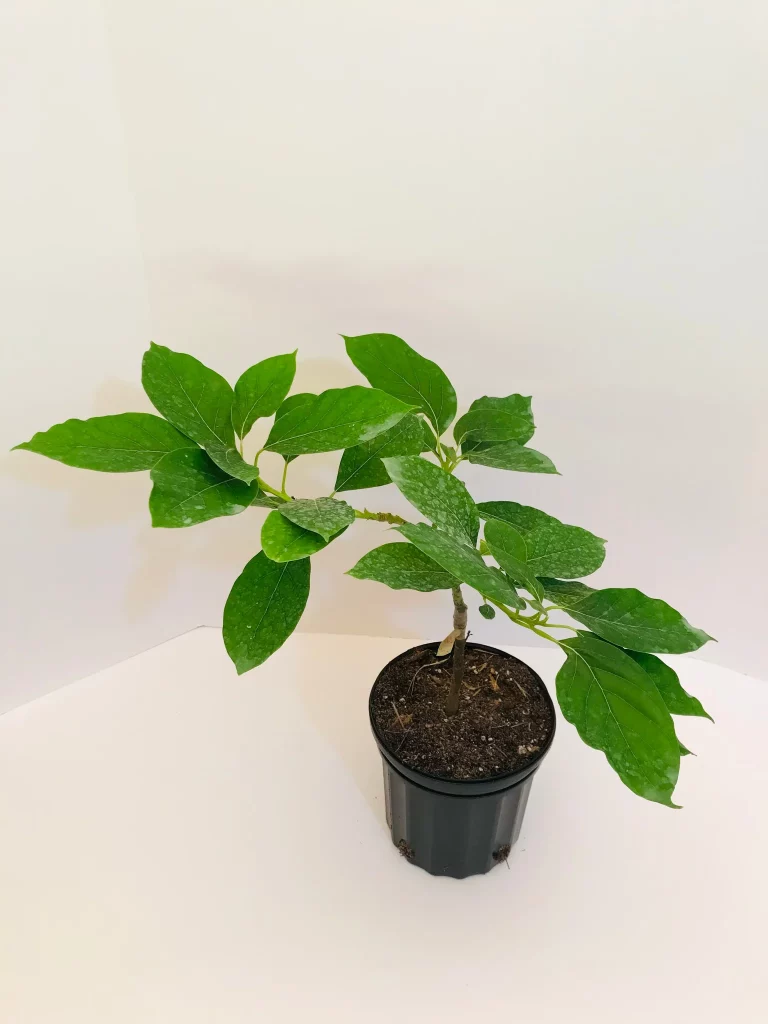
An avocado grown from a shop-bought fruit can become a leafy indoor plant, but it is best treated as a foliage project rather than a way to harvest avocados. A grafted plant gives you a better starting point if fruit is your goal, although flowering and fruiting in an ordinary UK home remain unlikely. This guide covers both starting from seed and caring for a potted tree.
For more on keeping an established plant healthy, see our avocado tree care guide.
1. Decide whether to grow from seed or buy a plant
- For a foliage plant: try the seed from a ripe avocado. It is an inexpensive project, but the seedling will not necessarily resemble its parent in fruit quality.
- If fruit is your aim: look for a named, grafted plant and check its eventual size before buying. ‘Wurtz’, also called ‘Little Cado’, is comparatively compact, but it is still a tree, not a small permanent windowsill plant. Grafted avocado plants can be difficult to find in the UK, and a suitable plant is no guarantee of fruit indoors.
The RHS avocado growing guide notes that avocado houseplants do not generally flower or fruit. A large, warm conservatory or greenhouse offers a more plausible setting for a fruiting attempt than a typical room.
2. Start an avocado seed, if you are growing your own
You can germinate the seed in water or sow it directly into damp, peat-free seed compost. For the water method:
- Remove the seed from the fruit and identify its broader, rounded end.
- Support it over a jar using cocktail sticks so that the rounded end rests in the water. Keep the jar in a warm place and top up or change the water regularly.
- Allow time for the seed to split and produce a root and shoot; this can take several weeks. Once it has several leaves and plenty of roots, carefully transfer it to a pot of peat-free compost, leaving the upper half of the seed exposed.
If you sow directly into compost, position the seed upright with its pointed end near the surface and keep the compost lightly moist, not saturated. Give the young plant a warm, bright place as it develops.
3. Choose a pot and free-draining compost
Use a pot with drainage holes that accommodates the existing roots without leaving them surrounded by a large volume of unused compost. For an established plant, a soil-based, free-draining peat-free compost is a practical choice; the RHS suggests peat-free John Innes No 3 with added horticultural sharp sand. A young seedling can start in a smaller pot of suitable peat-free potting compost.
When moving a plant into a new pot, keep the trunk at roughly its previous depth. If roots are emerging from the drainage holes, move up to a slightly larger container rather than a much bigger one. Empty any collected water from the saucer after watering.
4. Give it as much suitable light as you can
Place the plant in a warm, bright position, such as a sunny windowsill or a bright conservatory. A south- or west-facing window may work well in the UK, provided you watch for leaf scorch during strong sun and move a newly acquired plant into brighter conditions gradually.
Thin, stretched growth or a plant leaning towards the window can be a sign that light is inadequate. In a dim room, supplementary lighting may help foliage growth. Follow the light manufacturer’s instructions for placement rather than assuming one distance suits every lamp; the University of Minnesota’s indoor-lighting guide explains how light intensity and distance affect plants.

5. Water according to the compost, not the calendar
- Check the compost with a finger before watering, including below the surface. If it is still wet, wait and check again.
- When it needs water, water thoroughly and let the excess drain away. Do not leave the pot standing in water.
- Check more often during warm, bright weather and reduce watering when growth slows in winter. Aim to avoid both persistently soggy compost and a root ball that dries out completely.
Drooping or discoloured leaves do not, by themselves, tell you whether a plant needs more or less water. Check the compost and drainage before changing your routine.
6. Feed, repot and prune as it grows
Feed during spring and summer with a general-purpose houseplant fertiliser, following the label’s dose and frequency. Growth may slow in winter, so check the plant’s needs rather than continuing a summer feeding routine unchanged.
Check young plants regularly for roots emerging from the drainage holes. Repot into a slightly larger container when needed; established plants can be assessed for repotting in spring. Replace tired compost and take care not to damage healthy roots unnecessarily.
To encourage branching, pinch out the tip of a young shoot or cut a young main stem just above a leaf. The RHS suggests cutting back a seedling once its stem reaches about 15 cm, then pinching new shoot tips as it grows. Prune lightly to manage its shape; cutting a tall, spindly plant back more firmly may encourage new growth, but adequate light remains important.
7. Keep it warm and watch the air around it
Keep your avocado in a warm position away from cold draughts and radiators. The RHS recommends keeping plants indoors at about 13–18°C over winter and generally frost-free. If you put an established plant outside for summer, introduce it gradually to a sheltered position and bring it back in before temperatures fall.
Avocados appreciate humid air. A tray of damp gravel is an option, provided the water sits below the base of the pot so the compost does not become waterlogged. Gently wipe dust from leaves when needed, and inspect them for pests.
Will an indoor avocado produce fruit?
Usually not. A grafted plant may have a better chance than a seed-grown one, but avocados need considerable light, warmth, humidity and room to mature. A seed-grown tree can take ten years or more to reach fruiting size, and even a large, suitable conservatory or greenhouse may not produce a crop in the UK. Grow a windowsill avocado for its leaves and regard any fruit as an unexpected bonus.
Common problems
- Brown tips or edges: check whether the compost has repeatedly dried out, and consider dry air or a nearby radiator. Do not assume a single cause.
- Yellowing leaves: check how wet the compost remains and whether water can drain freely. Also review light levels and look for pests.
- Drooping or falling leaves: check the compost before watering. Recent changes in position, light or temperature may also be relevant.
- Spindly growth: move the plant to a brighter suitable position if possible; pruning alone will not correct poor light.
Related Articles
Want More Indoor Fruit Tree Ideas?
Discover the Best Dwarf Fruit Trees for Indoors
Once you’ve mastered avocado tree care, it’s fun to expand your indoor orchard. Compact trees like dwarf peaches, lemons, and oranges can all thrive in containers with the right light, soil, and pruning. Head over to Dwarf Fruit Trees for Indoors – A Complete Guide to compare varieties, learn pot sizes, and see which fruit trees will suit your home best.