
If you’d like fresh greens but have limited space, learning how to grow microgreens indoors is a practical starting point. A small tray on a bright windowsill can provide young leaves for salads, sandwiches and garnishes. You can sow throughout the year, although winter light may need supplementing. The RHS microgreens guide explains this small-space approach.
This guide covers seeds, trays, sowing, watering and harvesting, plus what to do when a crop looks unhealthy. If you’d also like to grow herbs beyond the seedling stage, see our guide to growing coriander indoors.
What Are Microgreens and Why Grow Them Indoors?
Microgreens are young edible vegetable or herb seedlings harvested for their stems and leaves, leaving the roots behind. Depending on the crop, they are cut when the seed leaves have opened or around the appearance of the first true leaves. They are older than sprouts but smaller than baby salad leaves, as explained by University of Florida Extension.
- Quick harvests: many common crops take roughly 1–3 weeks, although variety and conditions make a difference.
- Small-space growing: shallow containers are enough for these short-lived crops.
- Year-round sowing: indoor growing is possible in any season when light and warmth are adequate.
Start with one variety so you can learn its watering needs and harvest stage before trying blends. The RHS recommends crops such as cress, radish and mustard for small-container growing.

What You Need to Grow Microgreens Indoors
Trays and Containers
Use a shallow seed tray or a clean, reusable food container with drainage holes, standing inside a watertight tray to catch drips. Specialist equipment is optional. Shallow containers make cutting easier, while drainage helps you avoid saturated compost. University of Maryland Extension describes this two-tray arrangement.
Growing Medium
Fine, peat-free seed compost is a straightforward starting point; the RHS also suggests sieved multi-purpose compost. Use fresh growing medium for each batch. Coir and purpose-made microgreen mats are alternatives, but avoid garden soil or mixes containing raw manure. Choose a reputable supplier, following Penn State’s growing-medium hygiene guidance.
Seeds
Choose seeds explicitly sold for edible microgreen production, from a reputable supplier. Do not use seeds treated with fungicides or insecticides. Ordinary vegetable seeds are not automatically suitable just because the mature crop is edible.
Do not grow tomato, pepper, aubergine or potato seedlings to eat as microgreens. These are unsuitable at the seedling stage. Avoid unidentified seeds and check suitability before experimenting, as advised in Penn State’s guide to microgreen species.
Light
A bright windowsill may provide enough light. If your room is dim or seedlings keep stretching, consider a grow light. Follow the fixture’s instructions for distance and operating time rather than assuming every light works at the same height. University of New Hampshire Extension explains why light output and distance both matter.
Watering and Hygiene
Have a fine-rose watering can or clean misting bottle for sowing, plus drinking-quality water. Wash your hands before sowing and harvesting. Clean trays, scissors and work surfaces between batches; if using a sanitiser, choose one suitable for the surface and follow its label. Keep crops away from pets and sources of food contamination. These precautions follow Penn State’s microgreen food-safety principles.
Step-by-Step: How to Grow Microgreens Indoors
1. Prepare the Trays
- Add fresh compost, leaving room below the rim for watering and cutting.
- Level gently without packing it hard.
- Moisten evenly before sowing: aim for damp, not waterlogged.
2. Sow the Seeds
- Scatter seeds evenly, more densely than for mature plants but without piling them up.
- Follow the packet’s microgreen sowing rate and covering instructions.
- Label the tray with the variety and sowing date.
These preparation and sowing steps follow the RHS container-growing method.
3. Water Gently
Mist or water carefully so seeds stay in place. A tray with drainage holes can also absorb water from a shallow dish underneath. Once the medium is moist, lift it out and let excess water drain. Penn State’s home-growing guide recommends bottom-watering to limit water contact with the edible greens.
4. Germination Phase
Keep the tray somewhere comfortably warm. The RHS suggests 18–22°C for germination; check your packet for crop-specific requirements.
A clean lid can help retain moisture, but check and ventilate it daily. Follow the seed supplier’s instructions on light or darkness during germination rather than using a fixed blackout period for every crop. Remove the cover as seedlings emerge and need light. Covers and ventilation are discussed in Maryland’s growing guide.
5. Light and Growth
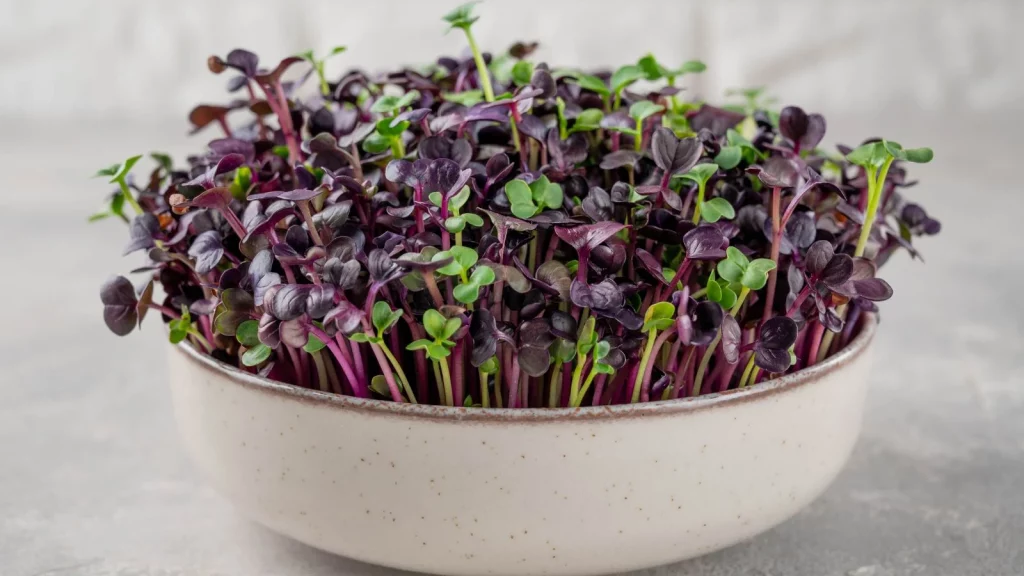
Give uncovered seedlings a bright position. If they become unusually pale, thin or stretched, improve the light rather than adding more water. Adjust a grow light within its manufacturer’s recommendations; stronger light can limit further stretching but cannot shorten stems already elongated. See UNH Extension’s explanation of seedling stretch.
6. Watering During Growth
- Check moisture daily, but water only when needed.
- Keep the compost moist rather than constantly saturated.
- Bottom-water where possible, then drain away unused water.
- Leave space around trays for air to circulate.
Bottom-watering helps keep leaves dry, but it does not make a crop immune to mould. Moisture control, drainage and airflow work together, as explained in Penn State’s watering guidance.
When and How to Harvest Microgreens
Use the crop’s leaf stage and packet guidance, not height alone. For many varieties, harvest falls between fully opened seed leaves and the appearance of the first true leaves. True leaves develop after the initial seed leaves and begin to resemble the mature plant’s foliage. University of Florida Extension describes this harvest window.
Harvesting Tips
- Use clean, sharp scissors and cut above the growing medium without pulling up roots.
- Harvest a whole tray or just the amount you need, while the remaining plants are still at a suitable stage.
- Rinse under clean running water immediately before eating, then dry gently.
- Refrigerate any harvested greens you are not using straight away in a clean container. Avoid storing them wet.
Penn State recommends washing just before use, rather than before storage. Purdue’s food-safety guidance also stresses keeping microgreens separate from raw meat and its juices.
Most microgreens will not produce a useful second crop after cutting. Pea shoots sometimes regrow, but sowing new trays is more dependable than relying on repeat harvests. This distinction is noted by University of Florida Extension.

Varieties to Grow as Indoor Microgreens
Choose varieties sold for microgreen use. These groups offer different flavours and textures:
- Peppery: radish, mustard and rocket.
- Brassica options: broccoli, kale and kohlrabi.
- More substantial shoots: peas and sunflower.
- Herb flavours: coriander, dill and basil.
Herbs can be slower, so do not expect every tray to reach harvest together. Grow varieties separately at first; for blends, choose crops with similar growth rates. Penn State’s species guide covers suitable crops and explains why compatible timing matters in mixes.
Common Problems When Growing Microgreens Indoors
Leggy, Pale Seedlings
Low light commonly causes stretching. Move the tray to a brighter position or adjust supplemental lighting according to the fixture’s instructions. Do not assume a fixed lamp distance suits every product. See UNH Extension’s lighting guidance.
Mould or Suspect Growth
Normal root hairs can look white and fuzzy around young roots, as illustrated by Purdue Extension. However, appearance alone should not be used to reassure yourself that a questionable crop is safe.
If you suspect mould, rot or contamination, do not taste the crop or try to save it by removing a few seedlings. The safest home-growing choice is to discard that tray’s crop and growing medium. This cautious approach follows UConn’s advice to discard mouldy soft produce. Clean the equipment before starting again.
For the next batch, reduce overcrowding, avoid soggy compost and improve airflow. These are preventive measures, not treatments that make contaminated greens safe to eat. Maryland Extension explains the role of airflow and moisture management.
Uneven Germination
Check that you sowed evenly, kept the medium consistently moist and followed the packet’s temperature and covering instructions. Different crops can germinate at different speeds, so mixed trays may look uneven even when growing normally. University of Florida Extension discusses these differences.
FAQs About Growing Microgreens Indoors
Do I need grow lights?
Not necessarily: a sunny windowsill can be enough for microgreens, according to UNH Extension. Consider supplemental lighting if growth remains weak or stretched, especially in a dim winter position.
How long do microgreens take from sowing to harvest?
Allow roughly 1–3 weeks for many common crops, rather than promising every batch in a fortnight. Conditions and variety affect progress; follow the packet and inspect the leaves. The RHS gives a similar general timescale.
Can I reuse the compost?
For this beginner method, start each microgreen batch with fresh growing medium. Compost healthy spent roots and compost where appropriate, and thoroughly clean reusable trays. Purdue advises against reusing the growing substrate; simply adding fresh compost does not sanitise an old batch.
Are microgreens more nutritious than mature plants?
Some contain higher concentrations of particular vitamins and carotenoids, but there is no universal advantage across every crop and nutrient. USDA research on 25 varieties found substantial differences between microgreens, with growing and handling conditions also affecting nutrient content. Concentration comparisons are not the same as comparing the small garnish you eat with a full vegetable serving.
Can I use normal vegetable seeds?
Only when both the species and the seed treatment status are suitable for edible microgreens. For a first crop, choose packets specifically labelled for that use. UNH Extension recommends microgreen seed and excluding insecticide- or fungicide-treated seed.
Final Thoughts on Growing Microgreens Indoors
Start with one small tray rather than several unfamiliar crops. Record what you sow, check it daily and use the results to plan your next batch. Keep the setup simple: suitable seeds, clean equipment, fresh growing medium and careful watering are more useful than extra gadgets.
Related Articles
TURN A WINDOWSILL INTO A MINI GREENS FACTORY
Easy Ways to Use Microgreens in Everyday Meals
Once you know how to grow microgreens indoors, the next step is making them part of your routine. Sprinkle them over omelettes, stir them into grain bowls, top soups and curries, or pile them into sandwiches instead of shop-bought salad mixes. A couple of trays on rotation can give you a steady stream of fresh greens with very little effort.