Root rot in houseplants is one of those problems that feels sudden, but it nearly always builds up quietly from too much moisture around the roots. The good news: if you catch it early, you can often save the plant with a few practical steps.
If you’re dealing with a musty smell at the same time, you can also read Why Indoor Plant Soil Smells Bad.
Quick answer: how to fix root rot in houseplants
Stop watering and remove the plant from the pot
Cut off brown, mushy roots (keep firm, pale roots)
Repot into fresh, free-draining compost in a pot with drainage holes
Water lightly once, then let the top few centimetres dry before watering again
Improve light + airflow so the soil dries at a healthy pace
Do this first: Take the plant out of the pot and smell/feel the root ball — if it’s swampy and roots are mushy, treat it today.
Contents
- 0.1 Root Rot in Houseplants: What It Looks Like (And What It Isn’t)
- 0.2 Why Root Rot Happens Indoors
- 0.3 How to Confirm Root Rot (The 60-Second Check)
- 0.4 How to Fix Root Rot in Houseplants Step by Step
- 0.5 The Best Soil Mix to Prevent Root Rot
- 0.6 Long-Tail Fix: Root Rot vs Underwatering (How to Tell Fast)
- 0.7 Long-Tail Fix: Can a Plant Recover From Root Rot Without Repotting?
- 0.8 Long-Tail Fix: Why Root Rot Keeps Coming Back
- 0.9 FAQs About Root Rot in Houseplants
- 0.10 Final Thoughts on Root Rot in Houseplants
- 0.11 Related Articles
- 1 Set Up a Healthier Indoor Routine
Root Rot in Houseplants: What It Looks Like (And What It Isn’t)
Root rot isn’t a single disease you “catch” — it’s what happens when roots sit in wet conditions long enough that they start to die and decay. Once roots are damaged, rot-causing microbes can take over.
Common signs you’ll notice above the soil
Leaves turning yellow and dropping (even though soil is wet)
Wilting that doesn’t improve after watering
Slow growth, limp stems, or a “tired” look
Soil that smells sour, swampy, or mouldy
What it isn’t (sometimes)
Underwatering (soil is dry and plant perks up after watering)
Normal leaf drop (one or two older leaves)
Dormancy in winter (growth slows but roots aren’t mushy)
Why Root Rot Happens Indoors
Most indoor root rot comes down to one problem: roots can’t access oxygen because the soil stays wet for too long.
This usually happens when:
the pot has poor drainage (or no drainage holes)
the plant sits in water inside a cachepot/tray
the soil mix holds too much moisture
watering is too frequent for the light/temperature
a pot is too big, so extra soil stays wet
How to Confirm Root Rot (The 60-Second Check)
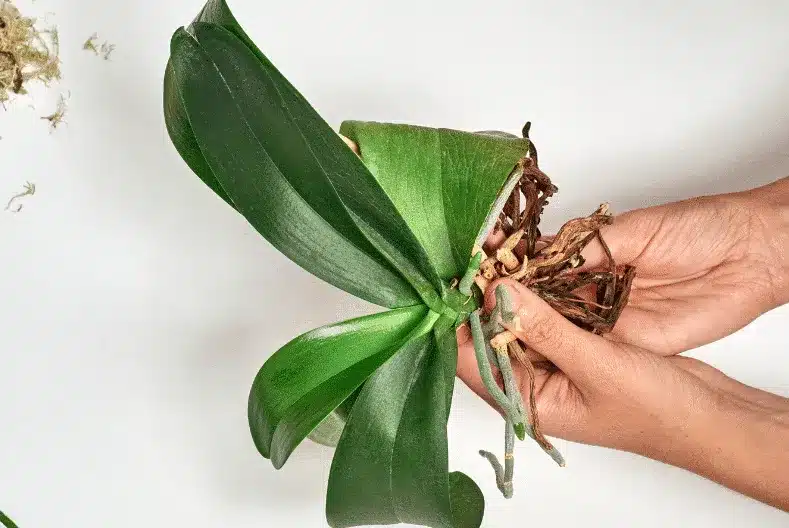
You don’t need special tools to confirm it — you just need to check the roots.
- Tip the plant out gently (support stems with your hand).
- Look for roots that are brown/black, mushy, or hollow.
- Smell the root ball — root rot often has a sour, stagnant smell.
- Check whether the soil is compacted and soaked through.
If roots are mostly firm and pale, you may be dealing with something else (like pests or low light). For a quick check on the most common indoor issues, see Common Indoor Plant Problems.
How to Fix Root Rot in Houseplants Step by Step
This is the rescue method that gives you the best chance without overcomplicating it.
1) Remove the plant and trim the rot
Start by gently loosening the soil so you can see the roots.
Cut away mushy, dark roots until you reach firm tissue
Keep as many healthy roots as possible
If the rot has reached the crown/stem base, the plant may be harder to save
Tip: Wipe or rinse scissors between cuts to avoid spreading decay.
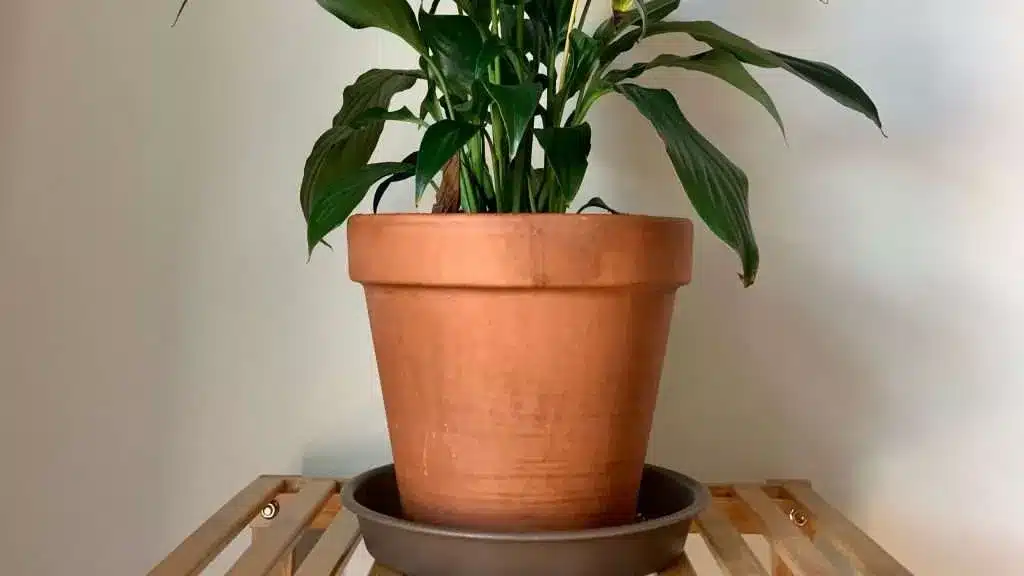
2) Repot into fresh, free-draining soil
Old soggy compost holds the problem in place. Fresh mix gives the roots oxygen again.
Aim for:
fresh compost that feels light and crumbly
a pot with real drainage holes
no standing water in saucers/cachepots
A clear nursery pot with drainage holes makes it easier to spot soggy soil early and prevents “hidden” overwatering.
3) Water once, then pause
After repotting, water lightly to settle the soil — then stop. Give roots time to recover.
A simple rule:
don’t water again until the top few centimetres are dry
in winter, that can take much longer than you think
4) Adjust light and airflow
Recovery is faster when the plant can use water steadily.
Move the plant to:
brighter indirect light
a spot with gentle airflow (not a cold draft)
If your plant area stays very still, even a small change in placement can make a big difference.
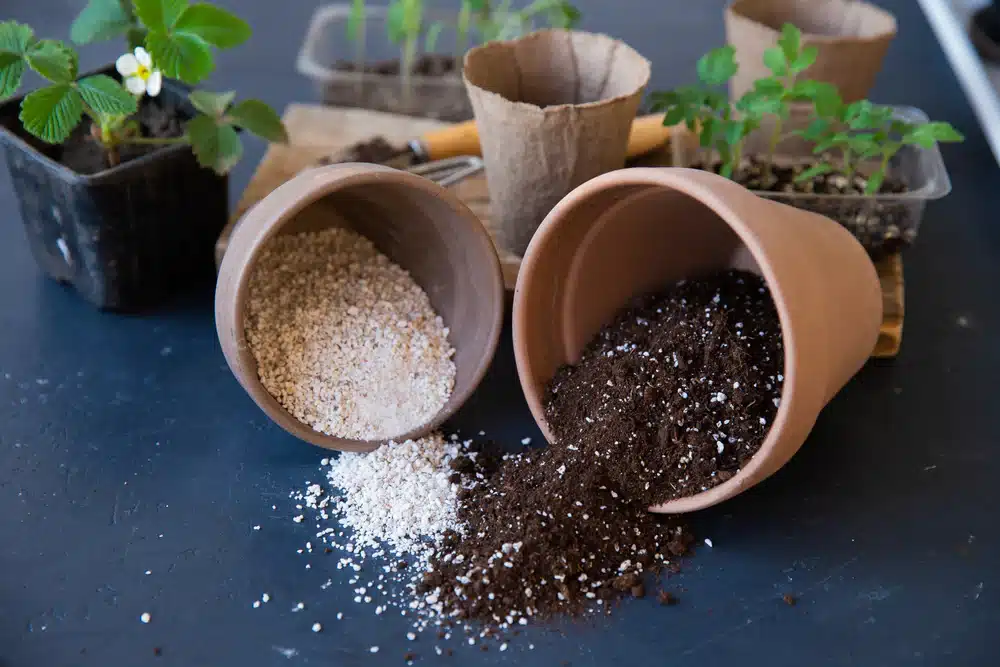
The Best Soil Mix to Prevent Root Rot
Under this H2, keep it simple: drainage + oxygen.
If you often struggle with wet compost, improving the mix is usually the biggest upgrade you can make. A slightly chunkier mix dries more evenly and reduces the “wet bottom, dry top” problem.
Try adding:
perlite
orchid bark
coarse grit (depending on the plant)
Adding perlite for houseplant soil mixes helps create air pockets so roots don’t suffocate when the soil is damp.
If you want a full walkthrough on fixing heavy soil, see Improve Indoor Plant Drainage.
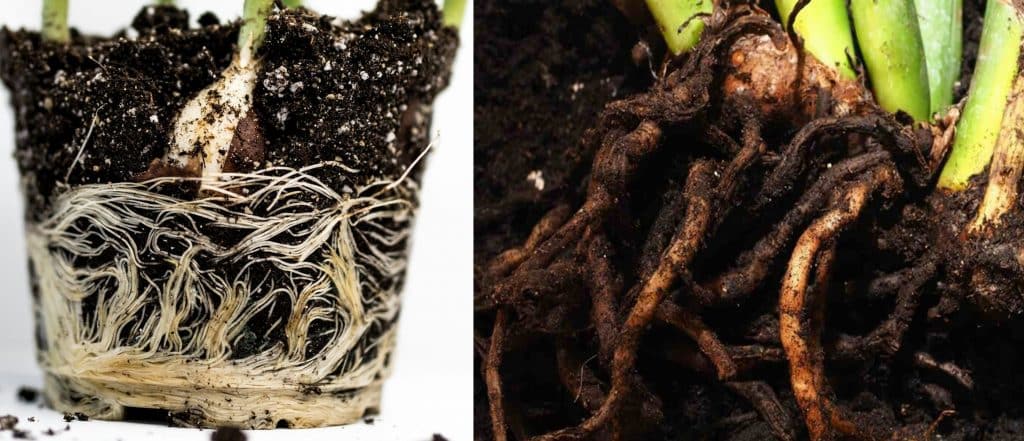
Long-Tail Fix: Root Rot vs Underwatering (How to Tell Fast)
A lot of people water more because the plant wilts — and that can make root rot worse.
Root rot clues
soil feels wet/heavy
leaves yellow and droop
plant looks worse after watering
Underwatering clues
soil pulls away from the pot edges
pot feels light
plant perks up within a few hours after watering
If you’re unsure, always check the root ball before changing anything.
Long-Tail Fix: Can a Plant Recover From Root Rot Without Repotting?
If it’s very mild, sometimes. But it’s risky.
You might get away with drying the pot out if:
the plant has only slight yellowing
roots are still mostly firm
the soil isn’t sour-smelling
If roots are mushy, repotting is the quicker, safer route.
Long-Tail Fix: Why Root Rot Keeps Coming Back
Recurring root rot usually means the environment is still too wet for too long.
Common causes:
pot too large
soil too dense
low light (plant uses less water)
watering on a schedule rather than by soil dryness
cachepots/trays holding water
A small routine tweak helps: check dryness with your finger at the edge of the pot, not just the surface.
A practical trust line you can place mid–lower in the article:
According to University of Florida IFAS Extension guidance on overwatering and root problems, improving drainage and letting soil dry slightly between waterings is key to preventing rot indoors.
FAQs About Root Rot in Houseplants
Can I save a plant if most roots are rotten?
Sometimes, yes — especially if the stem base is still firm. Remove rot, repot, and reduce watering. If only a few roots remain, treat it like rehab: bright indirect light and patience.
Should I use hydrogen peroxide for root rot?
Some gardeners use diluted 3% hydrogen peroxide, but it’s not always necessary. Focus first on removing rotten roots and improving drainage.
How long does it take to recover?
You’ll often see improvement in 1–3 weeks, but full recovery can take a couple of months depending on the plant and season.
Can I reuse the old soil?
No — it holds the moisture and microbes that caused the problem. Always repot into fresh mix after root rot.
Final Thoughts on Root Rot in Houseplants
Root rot in houseplants is fixable when you act early. The fastest wins are always the same: remove rotten roots, repot into fresh free-draining compost, and stop watering on autopilot.
Once you’ve saved a plant once, you’ll spot the signs sooner — and your whole indoor setup gets easier to manage.
Related Articles
MAKE PLANT CARE FEEL EASIER
Set Up a Healthier Indoor Routine
Root rot is usually a routine issue, not bad luck — small changes like better drainage, smarter watering habits, and simple tools make problems far less likely to return. If you want to tighten up the basics across all your plants, this guide helps you build a routine that actually works in real homes.