Contents
- 1 How to Revive Over-Fertilized Indoor Plants (Fix Burnt Leaves Fast)
- 1.1 Why Over-Fertilizing Happens
- 1.2 1. Spot the Symptoms of Fertilizer Burn
- 1.3 2. Flush the Soil Thoroughly
- 1.4 3. Trim Damaged Roots and Leaves
- 1.5 4. Adjust Your Fertilizer Type
- 1.6 5. Water and Light Balance During Recovery
- 1.7 6. Create a Balanced Feeding Routine
- 1.8 FAQs About Over-Fertilizing Indoor Plants
- 1.9 Final Thoughts on Reviving Over-Fertilized Indoor Plants
- 2 Revive Over-Fertilized Indoor Plants
How to Revive Over-Fertilized Indoor Plants (Fix Burnt Leaves Fast)
Fertilizer is supposed to help your plants grow — but too much of a good thing can do the opposite.
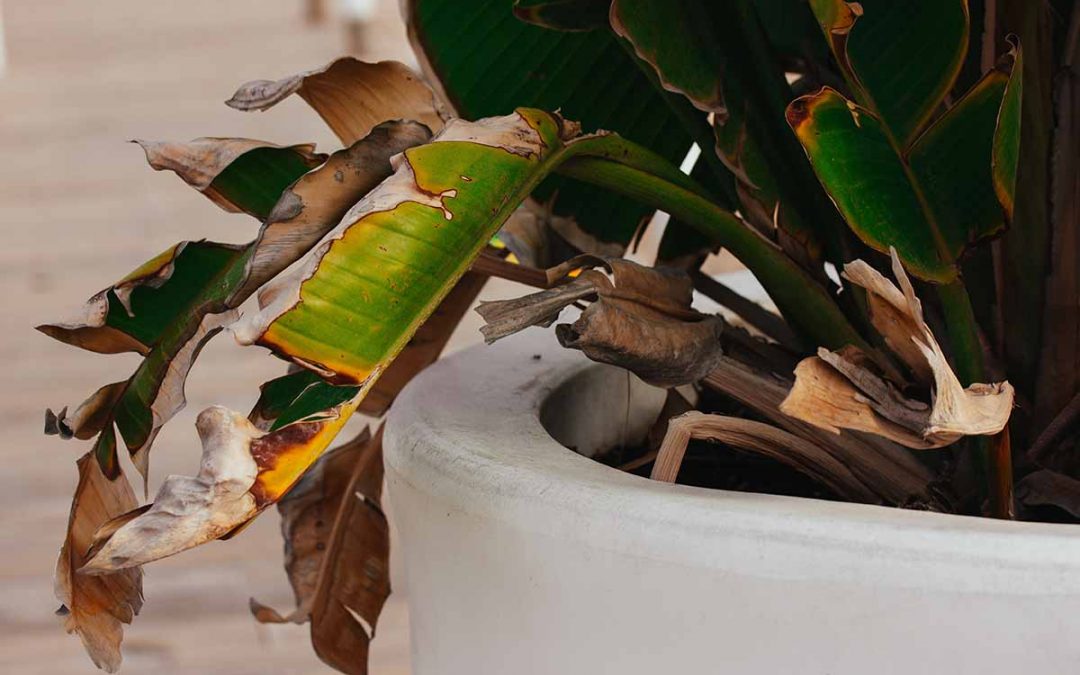
If your indoor plants suddenly have brown tips, drooping leaves, or dry, crispy edges, you might be dealing with fertilizer burn.
Luckily, most plants can recover if you act quickly. This guide shows you how to revive over-fertilized indoor plants, how to flush out excess nutrients, and how to prevent the same issue in the future.
Why Over-Fertilizing Happens
Indoor plants only need small amounts of nutrients since they grow in confined pots. When you add too much fertilizer — especially chemical or synthetic types — salts start to build up in the soil. These salts pull water away from the roots, causing dehydration, root burn, and leaf damage.
Common causes include:
Fertilizing too often (more than once a month for most plants)
Not watering enough after feeding
Using high-strength chemical fertilizers indoors
Ignoring product instructions or mixing errors
How Often Should You Fertilize Indoor Plants
Recognizing these mistakes early will help you reverse the damage before your plant’s root system collapses.
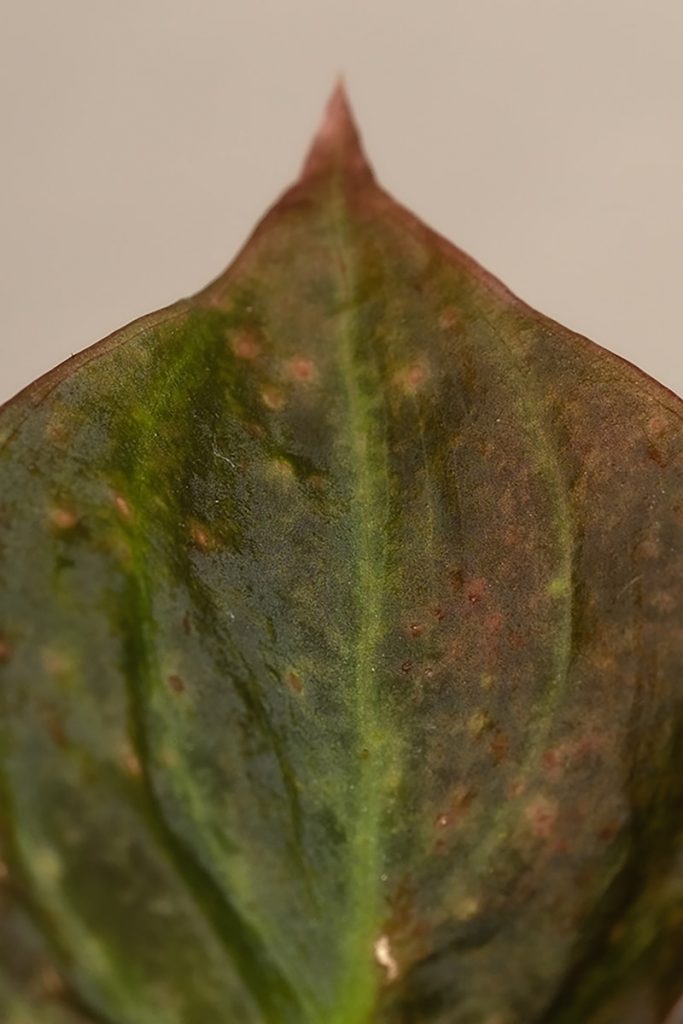
1. Spot the Symptoms of Fertilizer Burn
Knowing the signs helps you act before it’s too late. Fertilizer burn looks different from drought or overwatering but shares some symptoms.
Early signs:
Browning or yellowing leaf tips
White crust or powder on the soil surface
Leaves curling downward
Wilting even when soil is moist
Severe symptoms:
Crispy, blackened leaf edges
Sudden leaf drop
Foul odor from soil (rotting roots)
Salt buildup around the pot rim
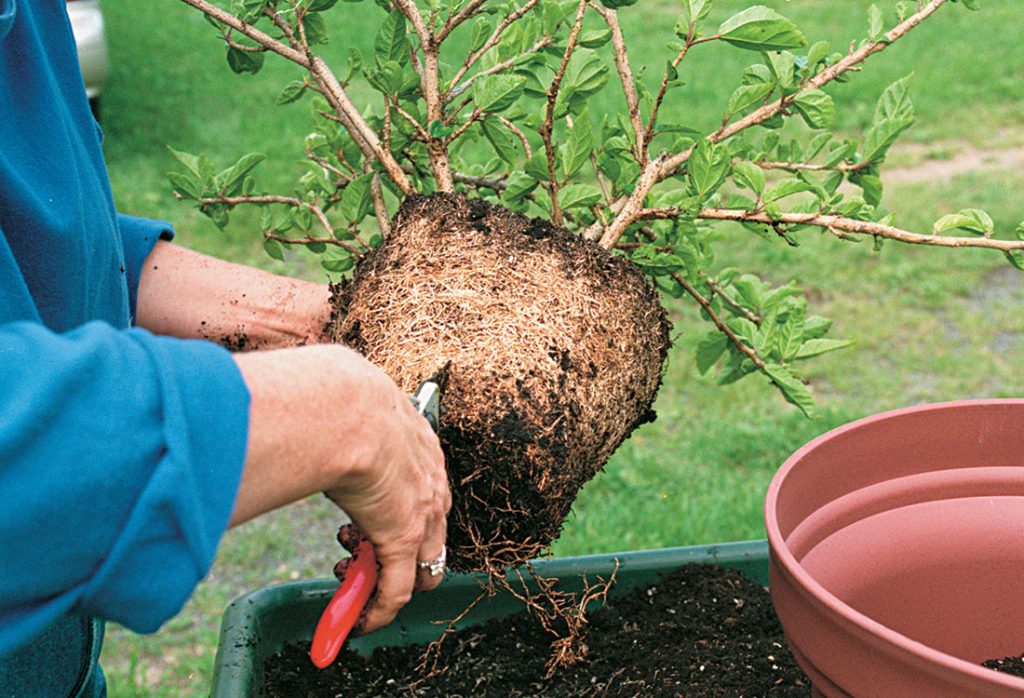
Gently remove your plant from its pot and inspect the roots — healthy roots are firm and white. If they’re brown or mushy, you’ll need to trim and flush.
2. Flush the Soil Thoroughly
The first and most important step is to flush excess fertilizer salts out of the soil.
Here’s how to do it properly:
Move the plant to a sink, tub, or outside area.
Slowly pour 3–4 times the pot’s volume of room-temperature water through the soil.
Let the water drain completely each time — never leave the pot sitting in water.
Repeat every few days until symptoms stop worsening.
If your plant’s roots are severely burned, replace half the old soil with a fresh, well-draining potting mix to dilute the buildup.
💧 Tip: Use a soil flush solution like General Hydroponics FloraKleen (available on Amazon) to neutralize salt residues more effectively.
Image suggestion: watering can flushing indoor plant soil over sink.
Alt text: flushing indoor plant soil to remove fertilizer buildup.
3. Trim Damaged Roots and Leaves
Once the soil is flushed, gently unpot your plant and examine the roots.
Use sterilized pruning shears to trim off brown, mushy, or dead roots — these can’t recover and only attract bacteria.
Do the same with severely burnt leaves, but leave as many green parts as possible so the plant can photosynthesize and heal.
After trimming, replant in fresh soil and water lightly. Avoid fertilizing for at least 4 weeks.
✂️ You can find bonsai and houseplant pruning shears on Amazon designed for precision cutting without damaging healthy roots.
4. Adjust Your Fertilizer Type
Switching to a gentler, controlled feeding method helps prevent future problems.
Organic or slow-release fertilizers deliver nutrients gradually, avoiding sudden salt spikes.
For example:
Slow-release pellets for houseplants (feed once every 3–6 months)
Liquid organic fertilizers made from seaweed or worm castings
Compost tea for a natural, nutrient-balanced boost
You can find organic liquid houseplant food and slow-release fertilizer spikes on Amazon — both easy to use and beginner-friendly.
The Spruce – All About Fertilizer Burn on Plants, and How to Fix It
5. Water and Light Balance During Recovery
After treatment, your plant will be in recovery mode for a few weeks. Keep it in bright, indirect light and water only when the top inch of soil feels dry. Avoid strong sunlight or drafts, which can stress weakened roots further.
Don’t fertilize until you see new, healthy growth — this shows your plant’s nutrient balance is stable again.
If your plant is large or root-bound, consider repotting into a slightly bigger pot with drainage holes to improve airflow and water flow.
6. Create a Balanced Feeding Routine
Once your plant has recovered, it’s time to rebuild a sustainable feeding routine.
General indoor plant feeding schedule:
Spring/Summer: every 4–6 weeks
Autumn/Winter: every 8–10 weeks (or pause entirely)
Tips:
Always water before fertilizing — never on dry soil.
Cut fertilizer strength in half for indoor use.
Alternate between organic and synthetic if desired, but never mix both at once.
Tracking your fertilizing dates in a simple calendar or plant care app prevents accidental overfeeding.
🌿 Helpful tools: digital moisture meters and plant care journals are available on Amazon to make feeding schedules easier to manage.
FAQs About Over-Fertilizing Indoor Plants
1. Can plants recover from fertilizer burn?
Yes, most can recover if caught early. Flushing the soil and trimming damaged roots gives them a fresh start.
2. How long does it take for plants to recover?
Typically 2–4 weeks, depending on severity and plant type. New growth is a good sign of recovery.
3. Should I repot after over-fertilizing?
If soil flushing doesn’t help or roots are heavily damaged, repot into fresh soil to restore proper drainage and nutrient balance.
4. Can I reuse flushed soil?
No. The salts remain in the soil even after flushing — best to replace or refresh it.
Final Thoughts on Reviving Over-Fertilized Indoor Plants
Over-fertilizing is a common mistake, but it’s rarely fatal if you act fast.
By flushing the soil, trimming damaged roots, and switching to a gentler fertilizer routine, your indoor plants can bounce back stronger than ever.
Remember — with indoor gardening, less is often more. Balanced care and patience are the real keys to thriving houseplants.
RELATED ARTICLES
KEEP YOUR PLANTS HEALTHY AFTER FEEDING
Revive Over-Fertilized Indoor Plants
If your plants got a little too much of the good stuff, learn how to flush the soil and fix fertilizer burn fast for healthy, green growth again.